Professional installation involves a detailed assessment of the existing infrastructure, careful planning of the gas line layout, and precise execution of the installation process. This commitment to quality and safety means that homeowners can enjoy their gas services—whether for heating, cooking, or powering appliances—without the worry of potential issues. Moreover, a qualified plumber will also provide documentation of the installation, ensuring that all work complies with the relevant safety regulations and codes.
Table of Contents
Introduction to Gas Line Installation
Gas line installation might sound like an intimidating concept, but it’s actually one of the most effective ways to upgrade your home’s functionality. With the right setup, you can tap into the many perks of gas-powered appliances—think quicker drying cycles, more precise cooking temperatures, and that cozy outdoor firepit you’ve been dreaming of. Whether it’s for your dryer, stove, firepit, or tankless water heater, the possibilities are impressive.
One of the best parts about installing gas lines is the balance it brings between efficiency and cost savings. Gas appliances typically use less energy than their electric counterparts, which is a win for both the environment and your wallet. Plus, they’re known for their reliability. Ever dealt with a power outage? Having a gas line in place means certain appliances can keep going, keeping your household running smoothly.
But before you get too excited, let’s talk safety. Gas line installation is not your average DIY project. Precision is essential, and one misstep can lead to serious risks. It’s critical to familiarize yourself with local building codes, understand how to detect leaks, and ensure proper ventilation. While some people feel confident enough to tackle basic installations, others prefer to leave it to the experts, which is never a bad idea.
Understanding the types of appliances you want to connect is also key to planning your installation. Each device—whether it’s a dryer, stove, firepit, or tankless water heater—comes with its own set of requirements. Knowing the right pipe sizing, ensuring proper connections, and placing shut-off valves strategically can make all the difference in creating a safe and efficient system.
Ultimately, a well-thought-out gas line installation is an investment in both your home and your peace of mind. It might take some upfront planning and coordination, but the rewards—comfort, efficiency, and a touch of luxury—are well worth the effort.

Installing a Gas Line to Your Dryer
Switching to a gas dryer can make laundry day faster and more cost-effective, but connecting it to a gas line requires careful attention to detail. Start by ensuring the dryer’s location is near an existing gas outlet to avoid unnecessary line extensions. If it’s not, you might need to reroute the gas line, which is best handled by a professional.
Before you begin any work, turn off the gas supply completely. Safety isn’t optional when working with gas. Once the gas is off, connect the dryer using a flexible gas line, which allows for slight adjustments in positioning while still maintaining a secure fit. Attach one end of the line to the dryer’s inlet and the other to the gas supply outlet. Don’t forget to use thread sealant or tape designed for gas lines to prevent leaks.
Next, it’s time to check your work. A simple soap and water solution can reveal leaks—just brush it onto the connections and watch for bubbles. If bubbles form, tighten the fittings and test again. This step is non-negotiable; undetected leaks can lead to serious hazards.
Once you’re sure everything is secure and leak-free, turn the gas supply back on slowly to allow pressure to build up without overwhelming the system. Adjust the dryer into its final position, ensuring the gas line isn’t kinked or pinched, as this could disrupt the flow or cause damage over time.
For added safety, consider installing a shut-off valve specifically for the dryer. This makes future maintenance or emergency responses much easier. Also, be sure to leave some space behind the dryer for proper ventilation and to avoid pressing the gas line against the wall.
Finally, if you’re replacing an electric dryer with a gas model, don’t forget to disconnect the old power source safely. While the gas dryer will still require electricity to power certain components, the connection is usually a simple plug into a standard outlet.

Connecting a Gas Line to Your Stove
Cooking with a gas stove can elevate your culinary game, but before you get ready to sauté and simmer, connecting it properly is a must. Start by making sure your stove is positioned near an existing gas supply. If the placement needs adjustments, it’s crucial to determine whether the line needs to be extended or rerouted—tasks best left to licensed professionals for safety and code compliance.
When you’re ready to connect the stove, safety takes center stage. Begin by shutting off the gas supply completely. A flexible gas line, designed for appliances like stoves, is the go-to choice here. It provides a secure yet adjustable connection, allowing you to position the stove without putting undue stress on the line. Attach one end of the flexible line to the stove’s gas inlet and the other end to the shut-off valve. Use gas-rated thread sealant or tape to create an airtight seal and reduce the risk of leaks.
Once the connections are in place, testing is non-negotiable. Use a soapy water solution to check for leaks—brush it over the fittings and watch for bubbles. If you spot any, tighten the connections and test again until you’re certain there’s no issue. Skipping this step is not worth the risk, so take your time to ensure everything is secure.
It’s also worth noting the importance of proper ventilation. Gas stoves emit carbon monoxide along with other byproducts, so having a range hood or a kitchen exhaust system that vents outdoors is vital. This keeps your cooking space safe and the air fresh while you whip up your favorite dishes.
Once the connection is complete and verified, gently move the stove into place. Check that the gas line is free of kinks or bends that could impede the flow of gas or weaken the line over time. An improperly positioned line can lead to future headaches, so give this step the attention it deserves.
Lastly, ensure the shut-off valve remains easily accessible. You don’t want to be fumbling behind the stove in the rare event that you need to act quickly.
Setting Up a Gas Line for a Firepit
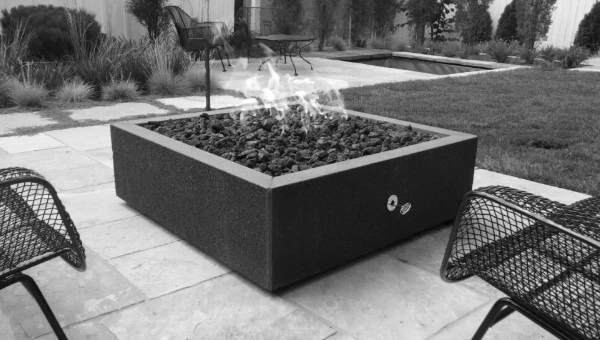
Transforming your backyard with a gas firepit takes some planning, but the end result is well worth the effort. The first step is deciding where to place it. Aim for an open area away from walls, overhanging trees, or anything else that could pose a fire risk. You’ll also want to ensure there’s plenty of space for seating and safe movement around the firepit.
Next, think about your gas supply. Your firepit will need a dedicated gas line, so start by identifying the closest connection point to your home’s existing gas system. If a new line needs to be run, it will likely involve trenching. This involves digging a path from your gas source to the firepit’s location and laying a gas pipe underground. Make sure the trench follows local codes regarding depth and placement—it’s not just about safety, but compliance too.
A key part of this setup is installing a shut-off valve along the line. This simple addition can be a lifesaver in emergencies or whenever maintenance is needed. Some homeowners opt for a keyed valve, which is designed specifically for outdoor firepits. This type of valve is not only functional but also provides an extra layer of control.
Once the gas line is in place, connect it to the firepit’s burner system. Make sure all connections are tight and secure, using gas-rated thread sealant to prevent leaks. Before lighting up your firepit, thoroughly test the entire system for leaks. Brush a soapy water solution over the connections and fittings, then watch for bubbles as you slowly turn the gas on. If there are any bubbles, tighten the fittings and retest until no more leaks are detected.
Ventilation is another critical factor. Although your firepit is outdoors, proper airflow helps ensure the gas burns cleanly and efficiently. Many firepit designs include built-in vents, but if yours doesn’t, consult the manufacturer for the best placement.
For added convenience, consider installing an electronic ignition system. While manual lighters work just fine, an electronic igniter simplifies the process and makes lighting your firepit quick and easy. It’s a small upgrade that can make a big difference.
With everything installed and tested, your firepit is ready to become the centerpiece of your outdoor space. Keep seating a safe distance away, and always have a fire extinguisher or water source nearby for peace of mind.

Gas Line Installation for Tankless Water Heaters
Tankless water heaters are game changers when it comes to energy efficiency and consistent hot water. However, getting them up and running starts with the right gas line installation. Because these systems heat water on demand, they require a higher gas flow rate compared to traditional water heaters. This means your existing gas line might need an upgrade to handle the increased demand. The first step is to calculate the heater’s gas requirements, which are usually listed in the manufacturer’s specifications. Ensuring the line is appropriately sized is non-negotiable—too small, and you’ll risk performance issues or even system failure.
Once the gas line sizing is determined, you’ll need to assess its path. Tankless water heaters are often installed closer to the points of use, like bathrooms or kitchens, to minimize heat loss and improve efficiency. If your installation location is far from the main gas line, additional piping may be needed to connect everything properly. Trenching might come into play if the new line has to travel underground, so be prepared to work within local building codes for depth and placement.
A critical part of the process is installing a shut-off valve along the gas line, ideally in an accessible location near the unit. This not only adds an extra layer of safety but also makes future maintenance a breeze. Once the line is in place, ensure all connections are secure using gas-rated thread sealant or tape to prevent leaks. Just like with any gas installation, leak testing is a must. A simple soap and water solution can help you pinpoint any weak spots—no bubbles, no worries.
Ventilation is another key consideration for tankless water heaters. Since these systems produce exhaust gases during operation, proper venting is crucial for both safety and performance. Whether your unit requires direct venting or a power vent system, be sure to follow the manufacturer’s guidelines to the letter. Inadequate ventilation could lead to dangerous carbon monoxide buildup, so this step isn’t one to skip.
Lastly, consider adding a sediment filter to the gas line if your area has issues with impurities in the gas supply. This can help extend the life of your heater and keep it operating at peak performance. A little foresight during installation can save you from headaches down the road.

Safety Tips and Regulations
Working with gas lines requires precision and care, as safety should always be your top priority. Before you begin any project, ensure you understand the specific safety guidelines that apply to your area. Local codes exist for a reason—they help prevent accidents and ensure installations are both safe and effective. Ignoring them could lead to fines, or worse, dangerous conditions in your home.
A gas leak is one of the biggest risks associated with gas line installation, so knowing how to identify one is crucial. If you ever notice a rotten egg smell, hear a hissing sound near a line, or feel dizzy while working around gas, stop what you’re doing immediately and turn off the gas supply. Evacuate the area and contact your gas company or a professional for assistance. Don’t attempt to fix it yourself—this is not the time to wing it.
Testing for leaks is a critical part of the process, as even small issues can escalate quickly. Always use a gas-rated thread sealant or tape when securing connections, and never skip the soapy water test. A few minutes of testing can make all the difference when it comes to preventing hazards.
Proper ventilation is another key factor. For appliances like stoves and tankless water heaters, inadequate airflow can lead to harmful carbon monoxide buildup. Make sure vents are unblocked and properly installed, as per manufacturer instructions. For outdoor setups like firepits, ensure the space is open enough to allow gas to burn cleanly and safely.
It’s also a good idea to install shut-off valves at accessible points along the gas lines. These valves allow you to quickly stop the flow of gas in case of emergencies or during maintenance. Having easy access to shut-off points is a small detail that can have a huge impact in a pinch.
Finally, never hesitate to call in a certified professional if you’re unsure about any part of the process. Gas line installation is one area where guessing isn’t an option. Qualified experts have the training and tools to get the job done right, giving you peace of mind and ensuring your home stays safe.
Conclusion and Professional Services
When it comes to installing gas lines, getting everything right from the start makes all the difference. Each connection, from a dryer to a stove or firepit, has its own unique considerations, and precision is key. While it can be tempting to roll up your sleeves and tackle the job yourself, the stakes are high. A small mistake could lead to big problems, which is why knowing your limits is just as important as knowing the steps.
For many homeowners, turning to professionals is not just a backup plan—it’s the smartest choice. Certified experts bring experience, specialized tools, and an in-depth understanding of local codes to the table. Whether you need a gas line rerouted, extended, or installed from scratch, they’ll ensure it’s done safely and up to standard. Plus, their know-how can save you time and stress while minimizing the chance of costly errors down the line.
Another bonus of working with pros is their ability to handle the unexpected. Older homes, for instance, may have outdated gas systems or infrastructure that needs upgrading before new lines can be added. Professionals can identify these issues early and address them efficiently, so your project stays on track. They can also offer advice on optimizing your setup for better efficiency, whether it’s choosing the right pipe materials or recommending additional safety features like shut-off valves.
Of course, hiring a professional doesn’t mean you’re entirely off the hook. Make sure to vet contractors carefully. Look for licenses, certifications, and reviews from past clients to ensure you’re working with someone qualified and reliable. Communication is also key—don’t hesitate to ask questions or request updates throughout the process. The more you know, the more confident you’ll feel about the results.
Investing in expert help can give you peace of mind, knowing your gas lines are installed correctly and safely. It’s not just about crossing tasks off your list—it’s about creating a home that’s efficient, functional, and ready to serve your family’s needs. So, whether you’re upgrading your appliances or adding a cozy outdoor feature, consider partnering with professionals to bring your vision to life. In the long run, it’s a decision you won’t regret.
FAQs
How to properly install a gas line?
Installing a gas line requires careful planning and adherence to safety protocols to ensure both efficiency and safety. First, it’s necessary to assess the location where the gas line will be installed, taking into consideration the distance from the gas source, the type of materials needed, and any applicable local building codes.
Begin by turning off the gas supply at the main valve to prevent any leaks during the installation process. It’s advisable to wear protective gear and ensure that the workspace is well-ventilated. Use the appropriate tools, such as pipe wrenches and pipe cutters, to handle the gas piping — usually made of copper, steel, or flexible materials, depending on the specific application.
Next, carefully measure and cut the gas pipes according to the required lengths, then connect them using approved fittings. It’s crucial to ensure that all connections are tight and secure to prevent gas leaks. After installing the piping, conduct a pressure test to check for any leaks; this typically involves sealing off the line and applying air pressure, monitoring for drops in pressure that indicate a leak.
Once you are certain that the installation is secure, turn the gas supply back on and check for leaks once more using soapy water or a leak detection solution. If bubbles form, there are leaks that need to be addressed. Finally, after thorough testing and confirmation of safety, the gas line can be connected to the appliance, ensuring that all connections are compliant with the manufacturer’s specifications and local regulations.
Proper installation is essential for safety and efficiency in using gas-powered appliances. If there is any doubt about the installation process, it is always best to consult or hire a licensed professional to ensure everything is done correctly.
What are the rules for installing gas lines?
The installation of gas lines involves several important regulations and safety protocols that must be followed to ensure both the efficacy of the system and the safety of those who will be using it. First, it is essential to check local building codes and regulations, as they can vary significantly from one location to another. This includes obtaining the necessary permits before starting any installation work.
Additionally, qualified professionals should handle the installation to guarantee that the work meets all safety standards and guidelines. Proper materials must be used throughout the installation process, ensuring they are compatible with the specific type of gas being used, whether natural gas or propane. Furthermore, it is crucial to ensure that all connections are secure and leak-free, as gas leaks can pose serious health and safety hazards.
Regular maintenance and inspections of gas lines are also vital to prevent issues over time. Home and business owners should remain vigilant, looking out for any signs of wear or malfunction in their gas systems. In summary, strict adherence to local regulations, using certified professionals, choosing the right materials, and committing to ongoing maintenance are all fundamental to the safe and effective installation of gas lines.
Why are gas lines so expensive?
The cost of gas lines can be attributed to a variety of factors that impact both the installation and maintenance processes. First, the materials used to construct gas lines are often made from high-quality steel or plastic, which can be costly. These materials need to withstand high pressure and potentially hazardous conditions, ensuring safety and durability over time.
Furthermore, the installation of gas lines involves significant labor costs, as skilled technicians must carefully install and test each line to meet strict safety regulations. This includes digging trenches, securing permits, and complying with local codes, all of which can add to the overall expense. Additionally, if the gas lines need to be installed in hard-to-reach areas or require complex routing around existing structures, the costs can increase dramatically.
Market dynamics also play a role in determining the price of gas lines. Fluctuations in demand for natural gas or energy can result in higher prices for materials and labor. Moreover, the upkeep and repair of existing infrastructure can lead to increased costs, particularly when aging systems require upgrades or replacement. All these factors combined explain why gas lines tend to be so expensive.
Do you need a permit to install a gas line?
In most cases, yes, a permit is required for installing a gas line. This is to ensure that the work is done safely and meets the necessary building codes. Different regions may have varying regulations, so it’s essential to check with your local building department or authority before starting any installation. Obtaining the proper permits helps guarantee that the work is inspected and approved by professionals who can confirm that everything is up to code.
Additionally, having a permit can protect you in case of future issues. If the gas line installation is ever questioned or if there’s a leak, having the right documentation can help prevent legal problems. It also shows that you took the necessary steps to comply with regulations to keep the community safe. Therefore, while the permit may seem like an extra step, it ultimately provides peace of mind and safeguards your home and family. If you’re unsure where to start, consulting with a licensed contractor or gas service provider can provide guidance through the process of obtaining the required permits.